
当館のリストア室にようこそ。私の製作工程を公開させていただきます。
Welcome to the Restoration Room. This page introduces my construction procedure for visitor's reference.
まずは、製作のための工具のご紹介。ごくごく普通のものばかりで「秘密兵器」みたいなものは何もありません。 米国のVLE社リリースのFokker Universalヴァキュームキットから、改造でSuper Universalを製作します。まずはパーツを切り離してサンドペーパーをかけます。手書きの図面と比べてお分かりのように、Super Universalの方がかなり大型です。
 キャビンの延長です。胴体を前後に切り離し、ヴァキュームキットの端材を裏打ちします。胴体左右の貼り合せを容易にするために、プラ板の"ベロ"を適当に付けておきます。胴体内部はグレー系をスプレーします。
  表側をプラ板で整形して境目をパテで埋めます。これで胴体の延長はほぼ終了。続いて主翼の拡張にとりかかります。まず主要部分への分割です。
 プラ板の貼り合せで、図面に合わせて主翼を組上げ、パテで仕上げます。胴体の底もプラ板を貼り付け、図面どおりの太さに整形します。透明プラ板から切り出したウィンドウグラスを取り付け、マスキングテープで覆っておきます。
 主翼にサ‐フェ‐サーを吹いたところ。胴体に水平尾翼を付けてパテ盛り。この後のサンドペーパーがけに備えます。
 塗装前の各パーツの状態。主脚はプラ板から自作。エンジン・排気管はエアフィックスのブルドッグから転用。車輪とプロペラはジャンクボックスから適当なものを捜し出して来ました。
 主翼と 胴体を塗装した状態。登録記号はMAXON社のインスタントレタリングを使っています。同社のものは良質で種類も多くて、とても便利。
 風防は透明プラ板から切り出して組上げます。マスキングテープでパーツ同士をつないだ状態で正しい角度を決めていき、慎重に接着します。
 排気管・主脚・支柱など主要なパーツを接着していきます。
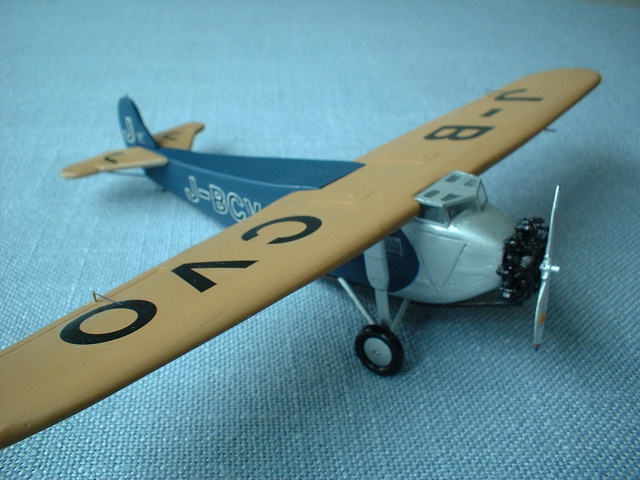 補助翼のワイヤ、ピトー管、足掛けを取り付けて完成です。